Back in the late 90's and into the early 2000's one of the best computer games, IMHO was Re-Volt. It was a simulation of racing RC cars with powerups and such. Really fun game.
There is a modernized and opensource version of it called RVGL at https://rvgl.org/ . From that page, the description is, "RVGL is a cross-platform rewrite / port of Re-Volt that runs natively on a wide variety of platforms. It's powered entirely by modern, open source components."
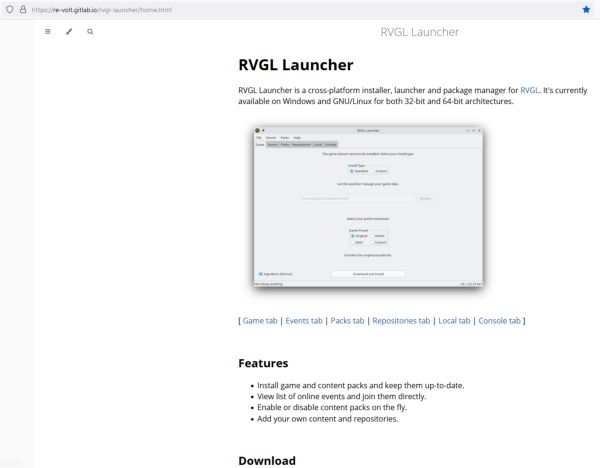
The best way to install RVGL though is through the RVGL Launcher, which is a cross-platform installer, launcher and package manager for RVGL. It's currently available on Windows and GNU/Linux for both 32-bit and 64-bit architectures. You can find the launcher at https://re-volt.gitlab.io/rvgl-launcher/home.html .
Here is a little tutorial on how to install RVGL on your Windows computer. Maybe in the future I will do one for Linux.
INSTALLATION
Download the launcher
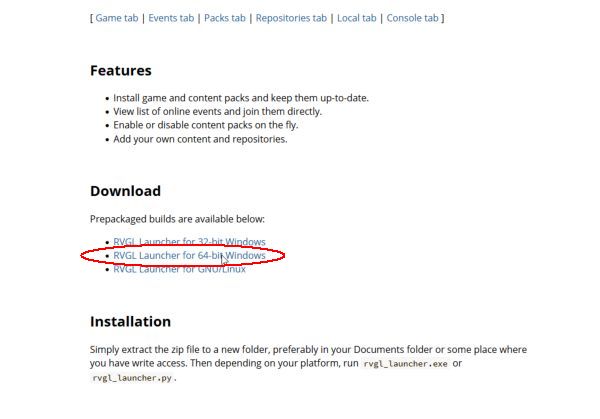
Once the RVGL Launcher file is downloaded, unzip (extract) the files to a place you have write access to. This usually means somewhere in your user folder, such as your Documents or Downloads folder.
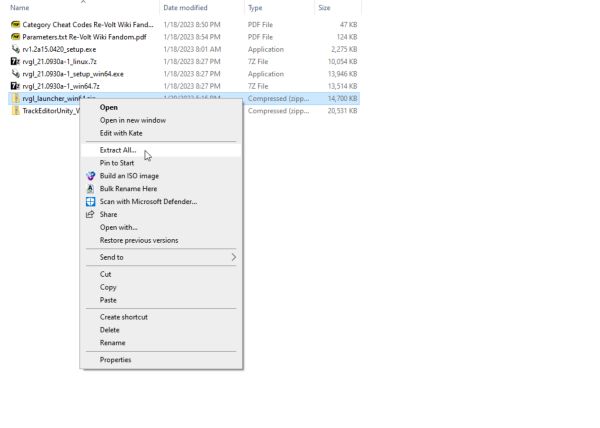
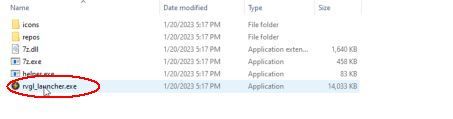
Once it is extracted, run the rvgl_launcher.exe file in the folder to extracted to.
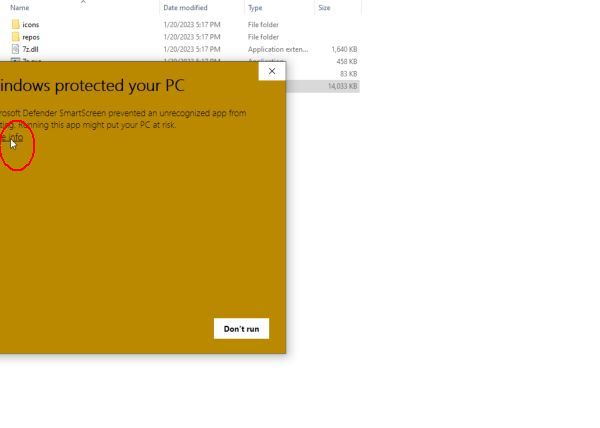
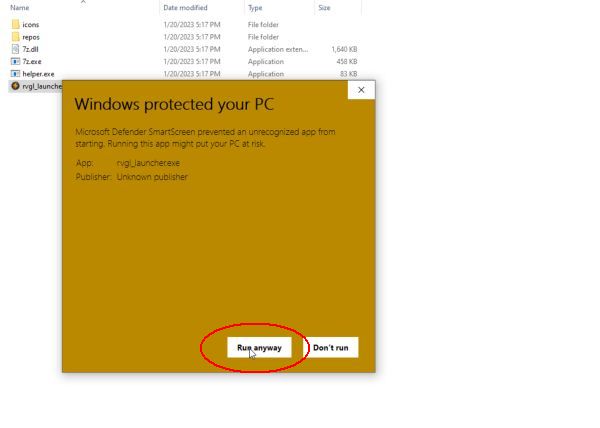
You may get a warning from Windows. Click the more info link and then the Run Anyway button.
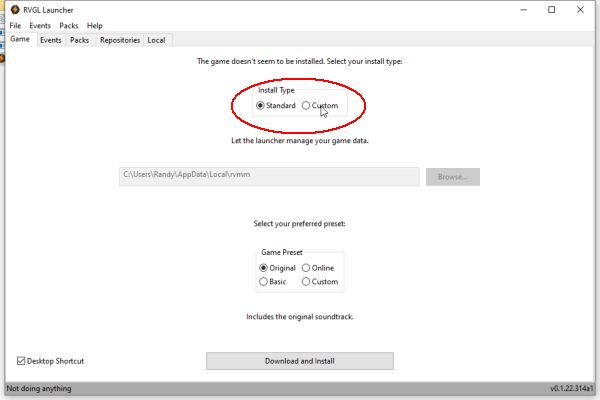
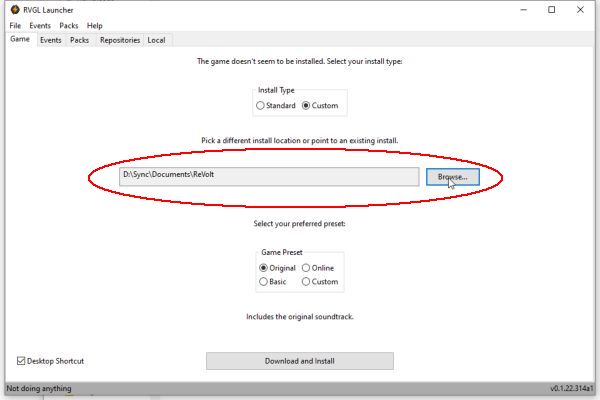
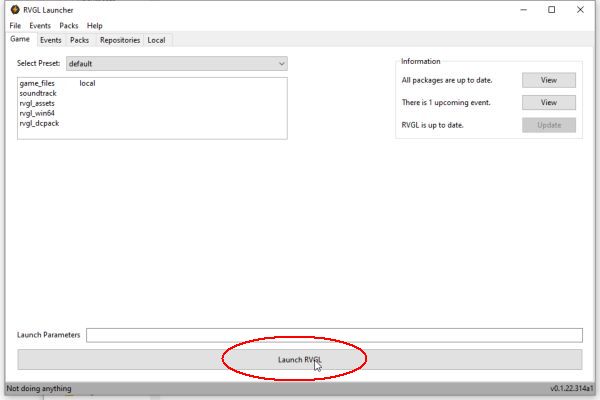
You will be greeted by the RVGL Launcher window. The default install location is buried in your AppData folder. I chose a custom install and opted for a more accessible location in my Documents folder.
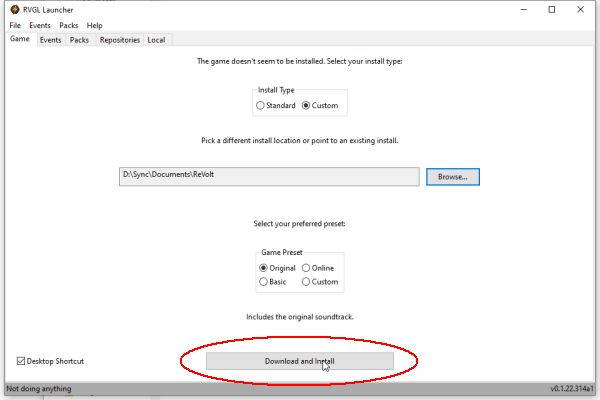
Then click Download and Install and the launcher will go out and get the current version of RVGL, install it to the location you chose, and install the default cars, tracks, and sounds so you have some contect to start with.
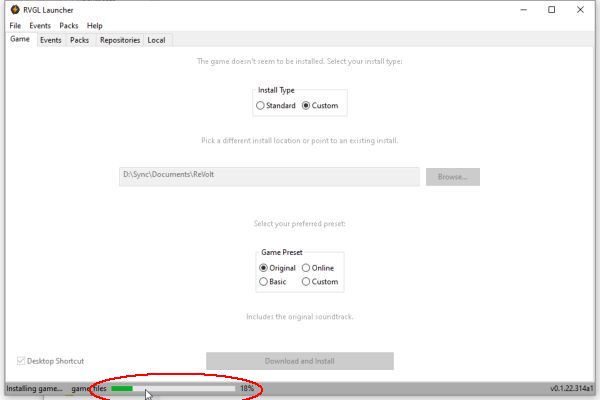
Note that there is a progress bar at the bottom even through it doesn't seem like it is doing much.
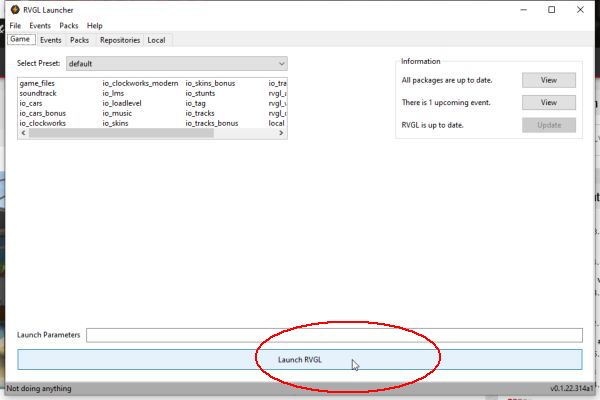
When the downloads and installation is done, you can launch your new installation and test it out. But then come back and we'll talk about the package managment feature of RVGL Launcher.
Did you try it out? No really, try it out!
PACKAGE MANAGEMENT
Probably the best part of RVGL Launcher is that you can manage optional packages for your RVGL install.
If you don't have RVGL Launcher running, find where you extracted it and run the rvgl_launcher.exe file again. Then click on the Packs tab.
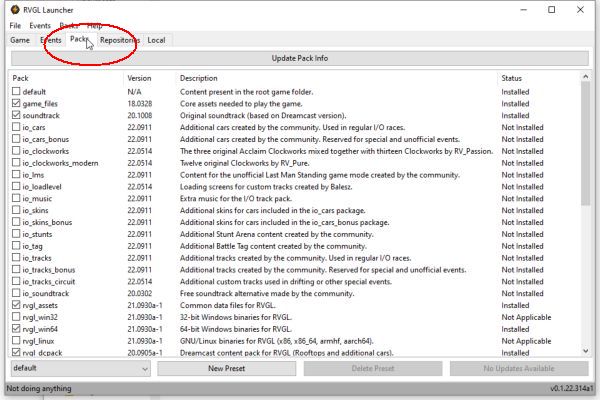
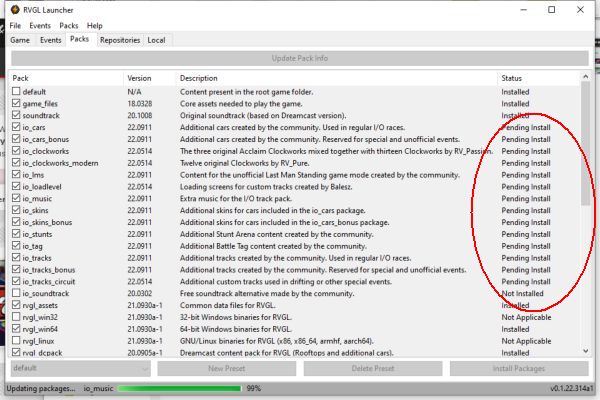
In the left column select some packages to install. Don't pick everything just yet! Here I selected all the "io" Packs, except the io_soundtrack Pack. The io packs are community developed addons and in my limited experience pretty safe. I did not install the soundtrack Pack since I like the original music.
Once you have the Packs selected click the Install Packages button on the far bottom right. Just like last time, you will have a progress bar at the bottom of the window. And again it may take some time depending on how many packages you selected and how fast you internet connection is.
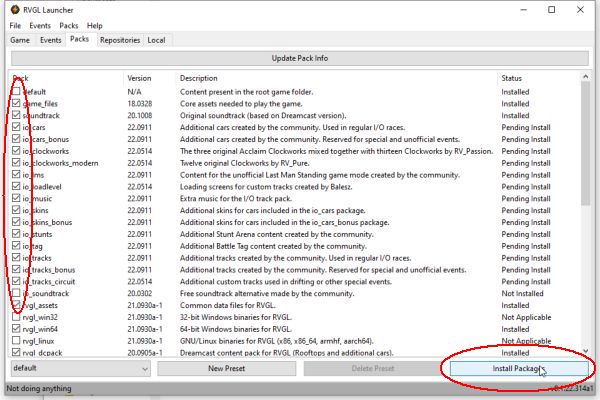
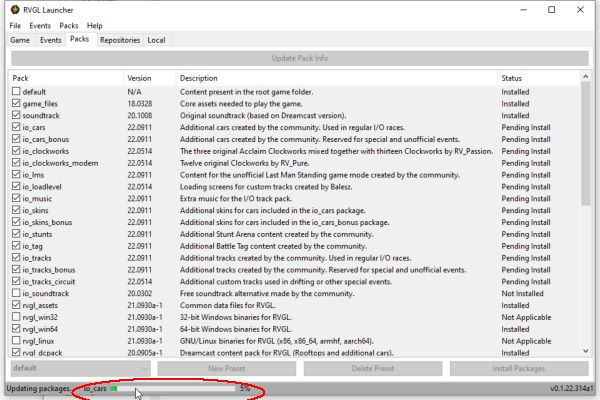
When that packages are all done downloading and installed, you will notice these packages that were listed as Pending install after the selection will now say Installed.
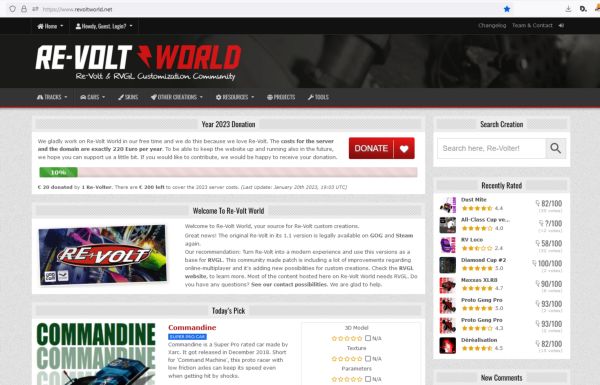
Another neat thing is that you can install RVGL content from other sites that offer a connection to RVGL Launcher. One such site is https://www.revoltworld.net/ .
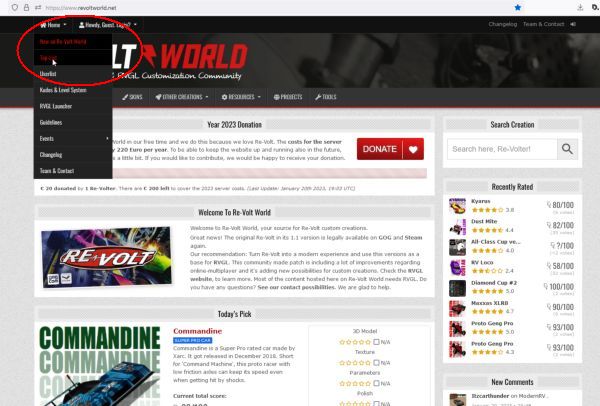
For example, you can go to their Top List page ( https://www.revoltworld.net/toplist/ ), you can pick from the best rated content on their site and install it with RVGL Launcher.
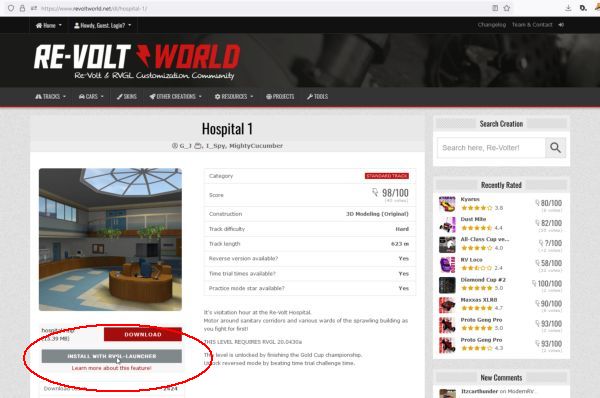
We'll pick the Hospital track from their top list page and then click the install with RVGL-Launcher button. The first time you do this, your browser may ask it you want RVGL Launcher to open this sort of link.
In the local tab on RVGL Launcher, you will see information about how the installation of the Pack is going.
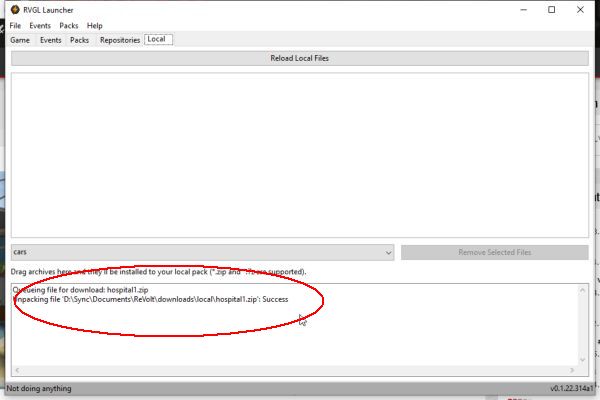
When the install is done (See the last work of "Success" in the lower window?) you can relaunch RVGL by going back to the Game tab and clicking on the Launch RVGL button.
Pretty painless once you play with it a while!
Last Notes and Tips
There are some Packs that must not play well with each other, which is why you might not want to install every Pack right away. There is one group that specifies this in the discription area in the Pack tab of RVGL Launcher. They have the prefix 'anm'.
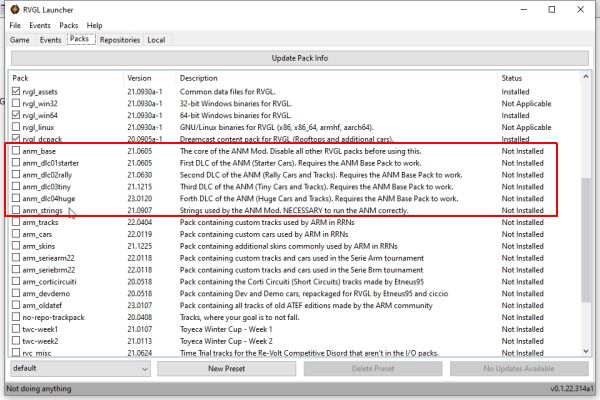
I didn't understand this at first, but you can install the Packs, and then just uncheck the boxes to the left after installation and before running the game to disable or enable specific packs. Very nice.
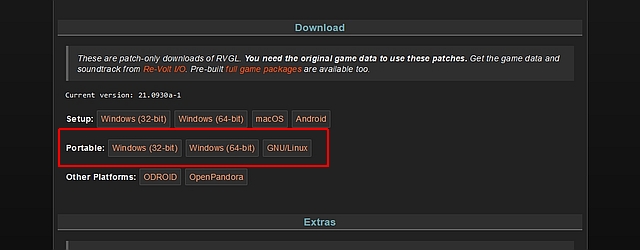
You can also start with the portable installation at https://rvgl.org/ , extract it to a folder of your choosing, extract RVGL Launcher to a differant folder, point it to the folder containing the portable files from rvgl.org and it will install all the packs and updates to that folder.
The cool thing about this is you can then grab the folder with the extracted portable version of RVGL, copy it to a thumbdrive and take it with you to play on any 64bit Windows computer.
FIN
I hope this has been helpful.